Thursday, December 19, 2013

Eggnog Custards


Eggnog Custards

This is the fifth part of an article from the Fall 2013 Blessed Living Women’s E-Magazine available FREE online at http://www.blwemag.com.
bondApetit_eggnogCustards02

Eggnog Custards

These custards are so easy to make and I usually have the ingredients on hand.
6 Eggs, beaten
3 cups Milk
2/3 cup sugar
2 teaspoon vanilla
1-2 teaspoon freshly ground nutmeg
1. Beat sugar into a mixture of the eggs and the milk. Pour into individual oven-prove dishes.
2. Sprinkle fresh ground nutmeg over mixture.
3. Bake using Bath Marie* method 325° F for 30-45 minutes (varies because of difference size ramekins used). Use the clean knife test for doneness**. [If you want to make a single large one – use a soufflĂ© dish and bake 50-60 minutes.]
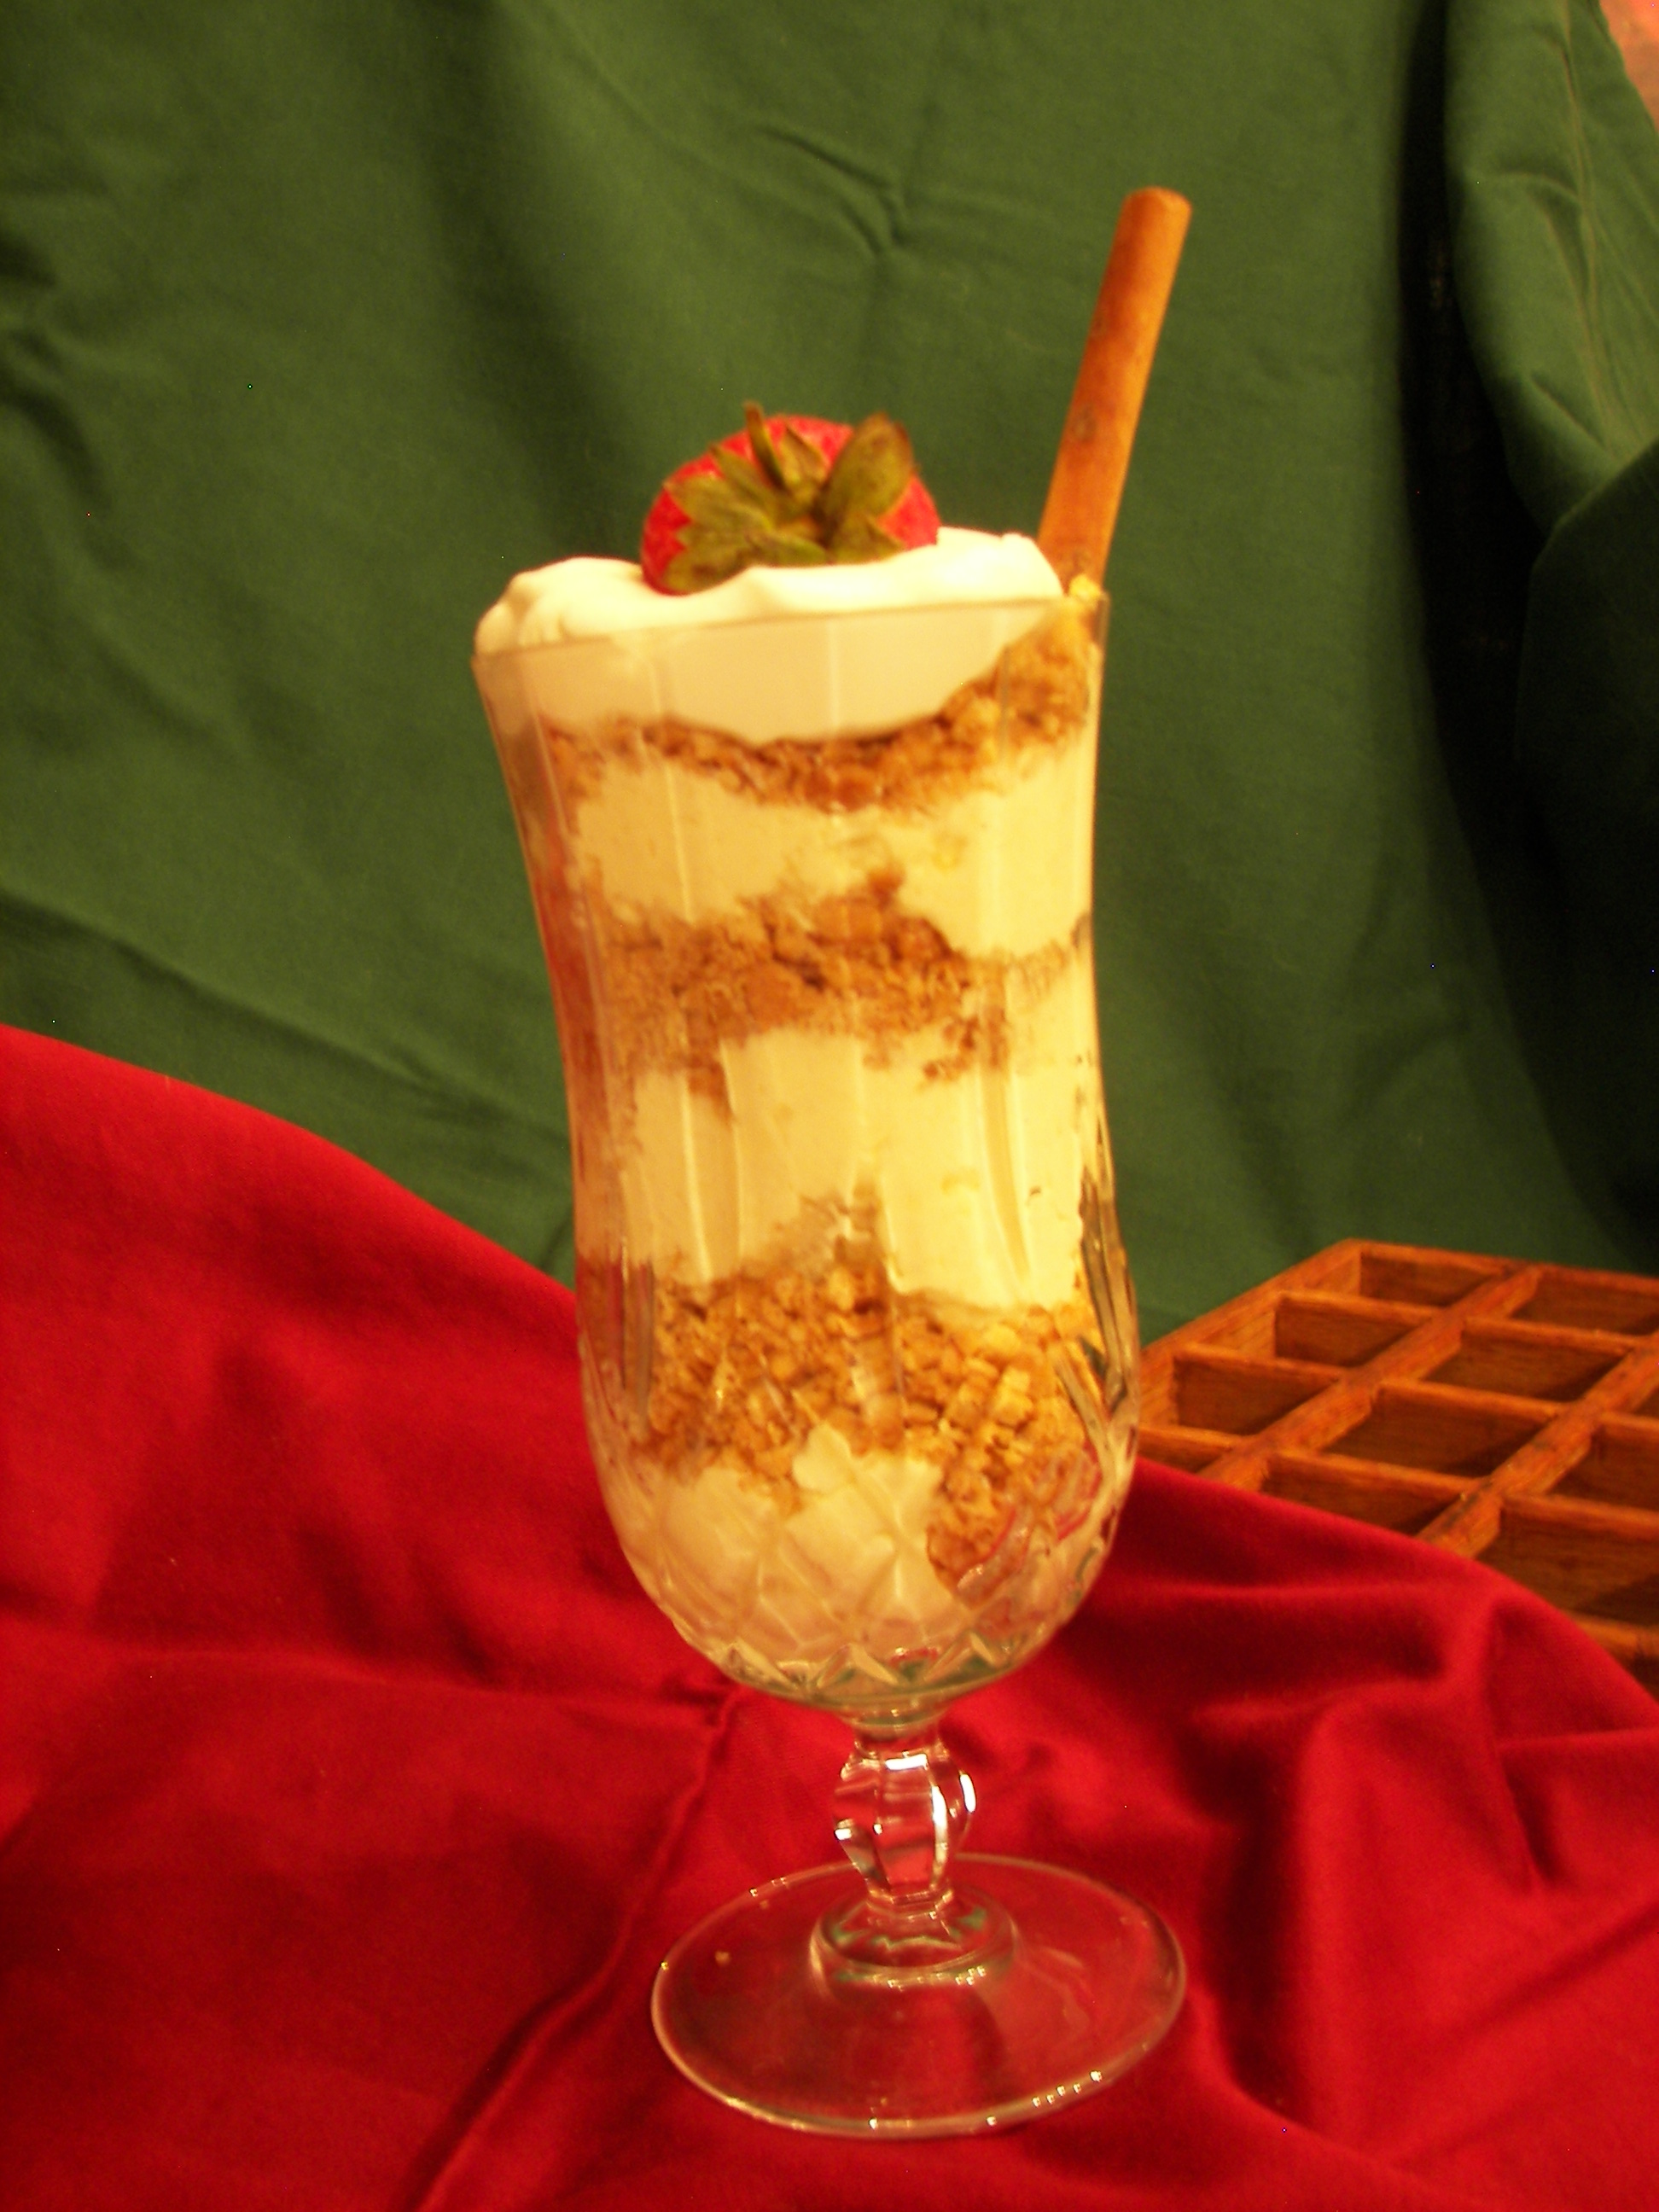
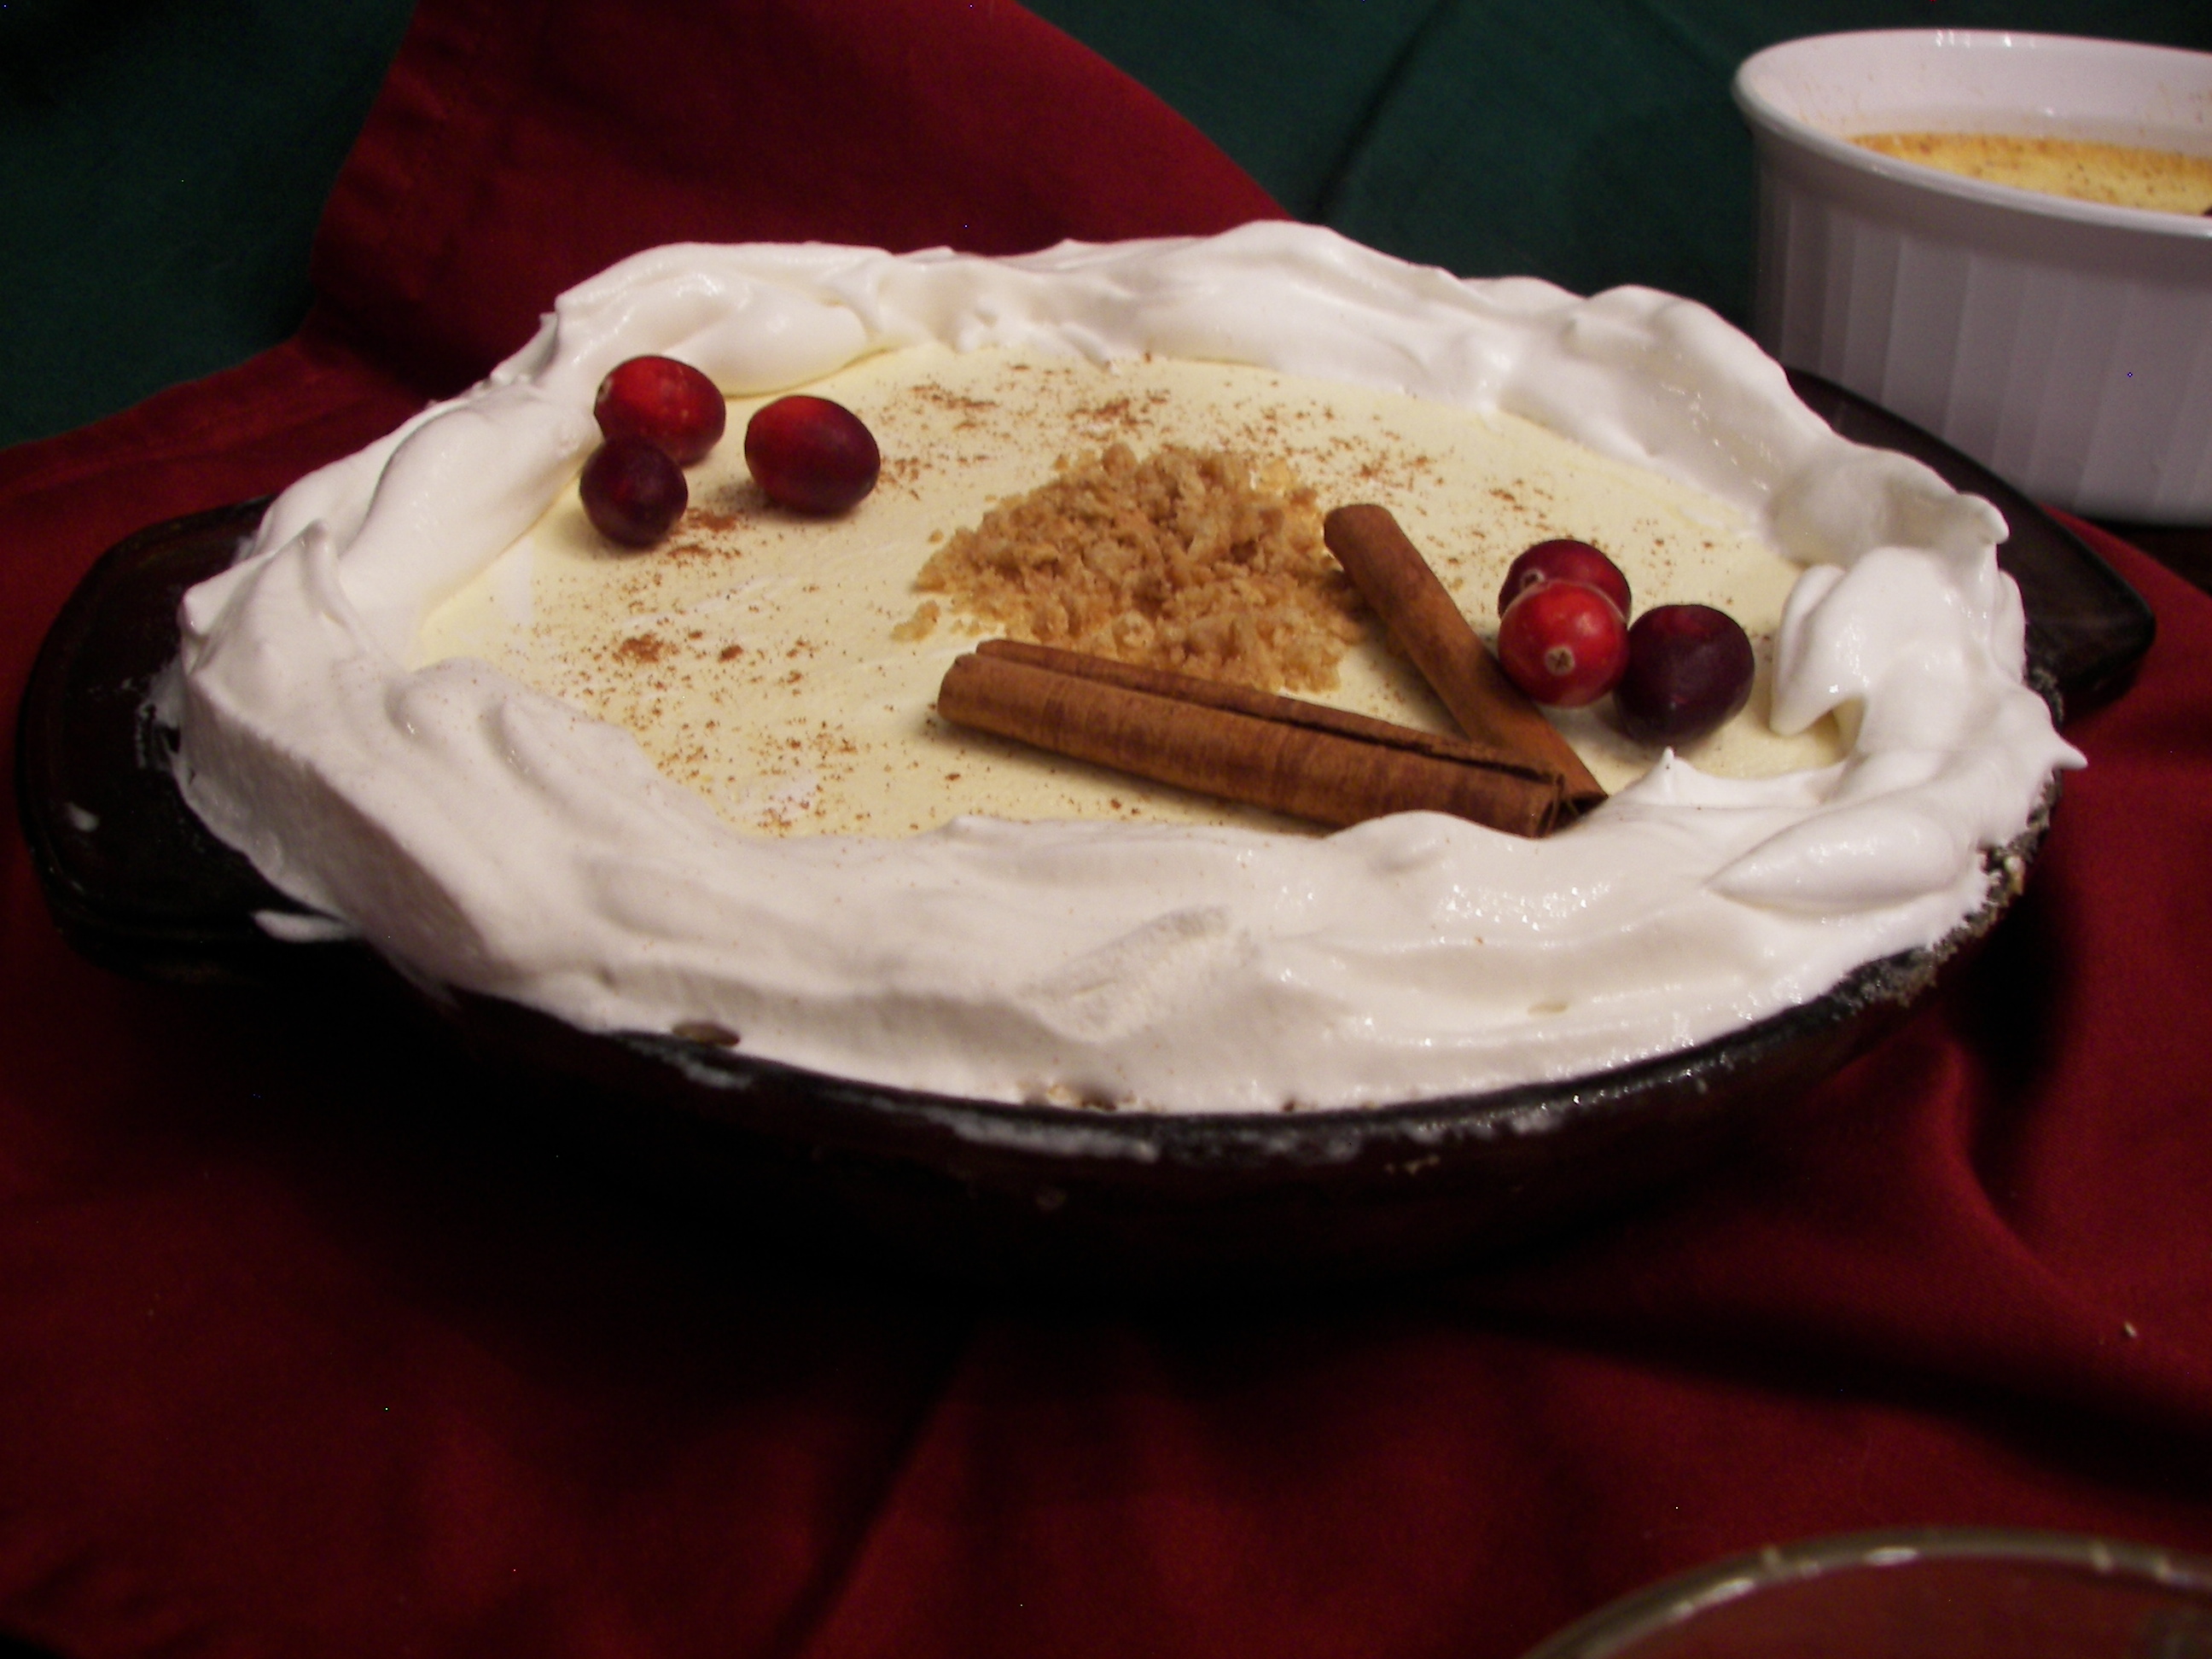
4. Serve warm from oven or as our family likes it – once cool, refrigerate for several hours. You can garnish to your heart’s content or serve as is.
**Test for doneness by inserting a clean knife into the center of one of the dishes, ascertaining it is still clean. If food clings to the knife continue baking 4-5 minutes and retest.

*Bath Marie: This method is used for many soufflĂ©s and custards. You place your baking dish with the ingredients into another larger pan. You surround the cooking dish with very hot water. It isn’t difficult when you learn that it is much easier to place the smaller dishes in the larger dish, set it on the oven rack and partially close the rack. Then using a pitcher with a long spout – pour the water into the larger dish until it is about half way up the sides of the smaller dishes. This method is so much easier than trying to carry the whole shebang – many filled dishes into a hot oven and not spilling a drop along the way.
When it comes time to remove the dishes, open the oven and with either a canning grip or shielded fingers (with good oven-proof gloves) remove each custard cup individually and set on a rack to cool. Leave the large dish in the oven. Allow it to completely cool and then drain and clean. By doing this piecemeal approach you avoid the awful mess of accidentally pouring HOT water into your perfectly baked custards and having a comical mess. Can you tell that I’ve experimented many different methods and have had my history of “Lucy and Ethel” culinary adventures?

For years I used commercial or homemade eggnog in place of the egg/milk mixture and the recipe worked perfectly.  We tried a different brand for a photo and the recipe failed miserably.  It must depend on the amount of real egg in the eggnog product.


Christmas Bavarian Cream


Christmas Bavarian Cream

Image
Christmas Bavarian Cream
This is part 4 of the article from the Fall 2013 Blessed Living Women’s E-Magazine available FREE online at www.blwemag.com

I really like this dessert because it is so light.  After a big holiday meal, it’s nice to sometimes just have a mouthful of fluff.  It’s perfect for those “too full for another bite” but still want a dessert.  I do have to preach here about fresh nutmeg.  If you don’t have a grater, pick one up for a few dimes at a thrift store and start grinding your nutmeg fresh each time – there is a major difference in taste.
3 envelopes unflavored gelatin
¼ cup brown sugar (light brown yields a better color – but use what you have on hand)
1 cup boiling water
1 cup COLD water (directly from refrigerator dispenser is fine)
¼ teaspoon nutmeg (approximate.  Use fresh ground always – if possible)
1 teaspoon rum extract (optional)
2 cups dairy eggnog (or your own fresh made)
1 tad yellow food coloring (optional)
Garnish – you can get as elaborate as you want decorating this
1. Mix the 3 envelopes of gelatin into brown sugar.
2. Stir in boiling water until gelatin is completely dissolved.
3. Stir in cold water.
4. Add in nutmeg and rum extract.
5. Refrigerate until it coats a spoon – about 20-30 minutes.
6. Pour into bowl of mixer and then at medium speed; beat until it is light and fluffy.
7. Gradually stir in the eggnog while blender is at low speed.
8. Add in a tad of yellow food coloring, if desired.
9. Pour into a 1-qt mold.
10. Refrigerate until firm about 4 hours.
11. Unmold, garnish and serve. 

Eggnog Sundae Desserts

Eggnog Sundae Desserts

bondApetit_eggnogSundaeDessert01
Part Three of the Eggnog Article that was published in the Fall 2013 Blessed Living Women’s E-Magazine, available online for FREE at www.blwemag.com.

Eggnog Sundae Desserts

4 3/4 oz vanilla wafers (or 8 graham crackers)
1/4 teaspoon nutmeg
1/3 cup melted butter
2 envelopes unflavored gelatin
2 cups eggnog
2 cups whipped topping
1. Make cookie crumble by crunching up vanilla wafers (or graham crackers). I use my food processor to mix all this together.
2. Toss in the nutmeg and melted butter. Set aside.
3. In a small pan, make the filling by sprinkling gelatin over 1 cup of the eggnog. Let stand 5 minutes to soften. I recommend using a double boiler.
4. Heat the gelatin/eggnog mixture until the gelatin is completely dissolved.
5. Remove from heat and add second cup of eggnog. Stir until evenly mixed.
6. Refrigerate until the mixture is thick and syrupy like unbeaten egg whites — about 40 minutes to 1 hour.
7. Beat the mixture until frothy.
8. Fold in 2 cups of whipped topping.
9. In sundae glasses, spoon some cookie crumble, then some eggnog cream. Alternate layers until you reach the top. Refrigerate until firm.
10. Serve with a dollop of whipped topping and/or favorite garnish.

Eggnog Bavarian Pie

Eggnog Bavarian Pie

bondApetit_eggnogBavarianPie01
This is part two of the eggnog article printed in the Fall 2013 Blessed Living Women’s E-Magazine available at www.blwemag.com.
Allow a dozen 2-ounce eggnog cubes (that’s 24 ounces of eggnog) to partially freeze. Crush in a blender until consistency of a slushy drink. Fold into 2 cups of cold whipped topping. Pour into a baked pie shell (pie pastry, graham cracker, ginger cookie, or vanilla wafer crust). Serve cold with garnish of your choice.
This pie freezes well. Once the pie is frozen, place in a large, freezable plastic bag. When ready to serve, let it thaw for an hour in the refrigerator before serving.

Eggnog French Toast

Use this eggnog or a commercial brand just as you would egg/milk in making French toast – delicious. You do know to bake your French toast, don’t you?

Eggnog Recipes


Eggnog -- plain and simple it is one of the true delights on her list and has been since she was 3 months old. By her second Christmas she’d ask for “nogk-nogk” and the name stuck. Being a mother who wants to major on my family’s likes and to minor on their dislikes (those good-for-them foods that I have to use every culinary skill in my arsenal to make them eat), I have been experimenting with eggnog.  Not only do I sometimes make my own, but I use it as a substitute in other recipes during the season when it is available in stores.  We have tried dozens of brands and our favorite is a store-brand from our local store: Publix.  They even carry a lower calorie version and I have used it in all these recipes and it did just fine. All these recipes work just as well with a commercial brand of eggnog.

So, I guess I should start with how to make your own Nogk-Nogk.  Without taking up the 3 pages that I did in my cookbook: Mega Cooking (pages 203-5) let me give you a fast run-down on how to make your own eggnog and a few ideas on things to do with it. The last three recipes are new and not previously published.

For this blog page, I'll post each recipe separately.  Also, all these eggnog recipes are available as an article in our FREE online magazine: Blessed Living Women's E-Magazine at www.blwemag.com.

We have also started a podcast on BlogTalkRadio or available from the magazine website.

Here's a recipe for homemade eggnog.

Nogk-Nogk -- Eggnog

(For those of you who don’t speak “infant” --  that’s Eggnog)
This “x1” recipe makes approx. 4 8-ounce servings. When I make it I “x4” the recipe.

6 eggs (pasteurized egg product equivalent)
½ cup sugar (or equivalent)
2 cups half ‘n half
2 cups milk
Dashes of fresh nutmeg

1. Separate eggs. Leave whites out at room temperature. (Research egg safety in your spare time and use “safe” eggs.)
2. In a large bowl beat the egg yolks.
3. Add the sugar. Mix well.
4. In a separate bowl beat the egg whites until stiff.
5. Fold the egg whites into the sugared egg yolks.
6. Slowly add the half ‘n half and milk. Fold gently.
7. Chill until very cold. (Best if chilled at least 12 hours before serving.)
8. Dispense. Sprinkle with nutmeg.

Freeze any extra. I like to use coated milk cartons for freezing eggnog blocks. You can also freeze some of it in ice cubes for a delicious snack.

The next recipe will be Eggnog Bavarian Pie.

Thursday, August 8, 2013

Jill's Gel

This one recipe has been so popular and rarely does a week go by that I don't hear about someone using it or asking questions since we first published it a couple decades ago (not this article).  So, I thought I'd add it here to the blog -- just in case you missed it. All new wording is printed in this purple font. The photos and enhanced instructions are also new.

Jill's GelTM

Q. We've heard wonderful things about God using your "Jill's Gel" for many health problems — may I have the recipe?

A.  Yes, here it is . . .  © 1993-2013 Jill Bond — all rights reserved

Background -- Because of Trent's condition (autism) I do a great deal of research. During some of my research I learned about the healing properties God placed in hydrogen peroxide.  I also have learned how with all man's processing of food, we are no longer consuming as much H2O2 as we used to.  I've read four books on the subject and have completed several first person interviews and I feel like I'm just starting to learn.  But I do know that this gel works for us and for those of my friends who have been testing it.  It might help you.  My initial contact about this chemical was on a visit to Lancaster County, Pennsylvania — Amish country.  I was the guest of a local Mennonite and was given entree to areas that usual "English" (outsiders) aren't allowed.  Some of the delightful Amish told me about hydrogen peroxide and gave me quite a bit of info. I was enthralled and have continued my research and experimentation.Because of a blood condition, when I bruise it is colorful for weeks.  I tested some of this gel on a fresh bruise and on the third day I went to apply the gel to the bruise spot and I couldn't find it.  There was no discoloration.   It had disappeared.I use this gel in place of facial moisturizers and my complexion is the best it has been in years.  I found out that some of the $100-an-ounce, anti-aging creams have H2O2 and lots of advertising.   Teenagers' acne medications are oxy-something.  I had terrible skin condition on my hands and tried dozens of Rx's over the years, and have been to many specialists — nothing has worked like this gel.  We're using this gel on Trent to help him process oxygen better and to stimulate his tactile senses. (He is hypo-tactile).   He's doing great.   (We are also doing other therapies along with this gel, so the gel can't claim all the credit for this improvement.)In addition to the gel, we use the hydrogen peroxide for many other applications, including mouth rinses and water purification. It works great in swimming pools in place of chloride. For more information about other applications, contact our ministry.

RecipeMega-Size: (yields 6 cups)

  • 4 cups Aloe Vera Gel (see note1)
  • 1 cup Food-grade Hydrogen Peroxide (see note2)
  • 1 cup Glycerin

Family-Size: (yields 1 & 1/2 cups)

  • 1 cup Aloe Vera Gel (see note1)
  • 1/4 cup Food-grade Hydrogen Peroxide (see note2)
  • 1/4 cup Glycerin

Individual-Size: (yields 3 ounces)

  • 1/4  cup Aloe Vera Gel (see note1)
  • 1 Tablespoon Food-grade Hydrogen Peroxide (see note2)
  • 1 Tablespoon Glycerin

Single-Use-Size: (yields about 1 ounce)

  • 1 Tablespoon Aloe Vera Gel (see note1)
  • 3/4 teaspoon Food-grade Hydrogen Peroxide (see note2)
  • 3/4 teaspoon Glycerin
Mix together thoroughly with utensil.  Do NOT allow undiluted H2O2 to touch your flesh.  Store in seal able container in the refrigerator.

Uses


Use as you would lotion for healing wounds, easing arthritis pain, facial moisturizer, acne cream, or other medicated ointments.


Notes


Note1:
Note1: Aloe Vera Gel —available at drug and household goods stores  — I buy the least expensive I can find. (Example: I found it at a local dollar store.) While some may claim medicinal benefit from store-bought aloe Vera gels, only one company (MannatechÆ) has the process for stabilizing the mannose sugars in the aloe Vera plant.   Without this process, the mannose sugar in the plant (which has been determined to be the healing compound) is broken down in a matter of a few days rendering the gel inert medicinally.  That's why you have to use fresh aloe Vera for topical applications.   In a matter of a day, the benefit is gone, so use the least expensive gel available for a base.
Vera Vera Vera We have made this gel using fresh cut aloe paste (cutting out the meat of the leaves of the plant and mashing it with a mort and pestle) — this is works well for the single-use-size quantity.  We then apply it immediately.   Again, the gel doesn't stay potent long. Sometimes I add some AmbrotoseÆ (from MannatechÆ) to the mix to add in the stabilized mannose and other key glyconutrients for added benefit.

Note2: Food Grade is 35% hydrogen peroxide (H2O2) and you can buy it at many health food stores. This is not the 3% stuff at drug stores. I make sure it has a childproof lid and I store it in a locked freezer.   It can be deadly if swallowed undiluted.  Don't handle it directly. Food grade solution directly on your skin will cause a very unpleasant burning sensation.  Immediately wash with water and soap.

Availability of Ingredients

We are trying to find companies who carry and will ship the hydrogen peroxide to you.  Is you have a good resource, let us know and we'll post it here.  Aloe Vera gel is available across the country as is glycerin.    We order ours in the gallon container from Frontier Herbs.  We bought a 55-gallon container of the Hydrogen peroxide that will last us for years.  We checked with chemical supply houses.
I had been able to recommend an excellent source for the food grade hydrogen peroxide, but that source isn't viable any more.  Try your local health food store, pool supply center, or water feature store. 
Glycerin is becoming less and less available here.  Recently we tried several local drug stores and they all said they didn't carry it anymore.  (I use it in several of my homemade concoctions -- I make our own soap, shampoo, cream rinse, household cleaning products, and almost all my "beauty" lotions, creams, etc.) I found it at Publix (our local grocery store chain) and via Frontier Natural Products Co-op.


If you try this, let me know how it works for you. bondingplace@yahoo.com — Type "Jill's Gel" in subject line.   I have a growing collection of testimonies. Remember I'm not a medical advisor, I'm just another professional mother who is trying to meet my family's needs and found some things that help.  We use many products, lifestyle adjustments, and diet to strengthen our health.  Not ONE item or adjustment makes the difference — it is God's blessing on our obedience to His Direction that works.

Some Comments:

"We love it and use it everyday!" — homeschooling mom "It has cleared up my aunt's psoriasis" — a niece

Additional Helps:

  • If it burns too much, then just reduce the amount of hydrogen peroxide.  The only time it burns me is if I have an open wound — the gel turns white and stings.  I use it every other day on my face and it never burns.   One lady told me it stung her face, so I told her to reduce the amount of hydrogen peroxide she was using.   Also, a concern would be that she could be scrubbing her face to hard and so the stinging is coming from openings in her flesh.
  • Here is another idea:
    Sometimes this gel can really sting.  It seems the worst the cut or abrasion, the more the bite.  I have experimented with many ways to reduce that intensity.  Here is my children's favorite remedy:

    To each bottle (two-ounce size) I drip in any combination of these essential oils:
    • Bergamot — 7 to 10 drops
    • Geranium — 3 to 5 drops
    • Clary-sage — 4 to 6 drops
This will change the consistency somewhat — lighten the color, but, oh, make it so much more soothing.  Test my adding a few drops at a time to the mix.  You do not want to make the gel too watery.  Depending on how thick the aloe vera gel you use for the base mix will affect the viscosity of the gel.   So, again, just add drops in one at a time and mix.  STOP if it starts to dilute too much.

This method also smells wonderful. And certainly you can vary these according to your own specific preferences for scent or for the medicinal appeal of certain Essential Oils.
  • I store my gel in the refrigerator.

Here are some updated steps:


Since this item is a concoction that I make on a regular basis, I simply the process.  Initially you'll need to measure each ingredient.  But as you add it to your glass jar indicate a line with a permanent marker or paint pen. Then add the next ingredient and mark the line.  Continue and the next time you mix this balm, you won't waste any of the ingredients to the sides of your measuring cups or even have to wash any extra dishes.  I found this method works so well with most of my concoctions because I'm like you -- I need easy in my life. You might want to write the ingredient on the jar in each section if that helps. I type quick sheets of ingredients of my favorite recipes with very abbreviated steps.  Then I tape them inside the doors of my kitchen cabinets -- couldn't be quicker to find.

Stir or shake really well. I save chop sticks for mixing that way I don't feel like I'm wasting anything if I have to toss them (in the trash, fire, or compost -- depending on the ingredients).

As with most of my goo, balms, and solutions, I store them in glass jars and seal them airtight with my "pump 'n seal."  It isn't necessary to store them airtight, but I like to -- extending the shelf life and keeping them fresh. Be sure to label and date it.  As we use it I transfer some of it to small bottles that have eye droppers to make it very easy to use.

Of course, the color your gel will variety according the color of the aloe vera suspension you use as the glycerin and peroxide are clear.  I suggest those of you who are able, make your own aloe vera gel. There are numerous other blogs with instructions as to how to make it so I won't got into detail here.  

A few days ago Alan was stung by a wasp and as quickly as possible we put gel on the spot.  It not only soothed the itch, but the swelling went down quickly.  

God is so amazing to bless such simply ingredients in so many ways and uses to heal us.

References

  1. ?? — my favorite book on this subject I bought from an Amish family, but I loaned it out and it has never been returned.  I'm still hunting for another copy.  I'd recognize it if I saw it, but I can't remember the name or author.
  2. ?? — my next favorite book also was never returned after a loan.  (I now keep a tighter rein on my books, so I still have the other two.)
  3. Donsbach, Kurt W.  Oxygen Oxygen Oxygen,  © 1993 The Rockland Corporation; ISBN 1-56959-570-4
  4. McCabe, Ed.  O2Xygen Therapies, A New Way of Approaching Disease; © 1988 Energy Publications; ISBN: 0-96205727-0-1
  5. Dozens of articles and handouts and first person interviews

  We are NOT commercially connected to Mannatech.

This article was printed from the web site www.preacch.com. PREACCH = Parents Rearing and Educating Autistic Children in Christian Homes. Permission is granted to print one copy for PERSONAL use. For multiple copies or any other use, please contact Jill Bond for permission.
Jill Bond, PO Box 13303, Fort Pierce, FL 34979. All rights reserved. 'THOU SHALT NOT STEAL."

Contact us at bondingplace@yahoo.com